A mappers review of Ipad Pro

Village 01 grid
It’s been three months since I bought my iPad Pro and Apple Pencil. So I’ve had some time to test it thoroughly.
My expectations for the iPad was really high when I bought it. I had seen a lot of reviews of it and had also tested it shortly at the Apple Store. But even though my expectations were high I was really surprised and a bit shocked on how extremely well it worked.

I’ve had a Wacom Cintiq for nearly three years and most of my maps have been made using it and Photoshop on my computer. The Cintiq works really well but you still have some parallax while drawing. That means that when you press the pen to the screen the actual line comes a bit to the side. In the beginning that was a bit awkward, but I soon got used to it and you could also fiddle a bit with the settings so that the parallax almost disappeared.
So the first thing I realised while using the iPad Pro was the lack of parallax. You put down the pen and that is where the line will appear. This might sound like a very small thing, but believe me if you draw digitally it is a very big thing.
It is also amazing how Apple in their first try can accomplish something that Wacom is still struggling with.

The second thing to do after getting my hands on the iPad was to find the right application for me. I tried out quite many different ones like paper53, Photoshop sketch and Procreate. Quite soon I realised that Procreate was by far the best app for the needs I have. The program runs fantastically smooth even when you have quite many layers to work with. Also the different brushes in the app are really good.

So now when three months have gone by I must say that I found a new fantastic tool in the iPad Pro when it comes to drawing maps, and that I miss my computer and Wacom Cintiq less for every day that goes. I’m actually trying to do most of my work on the iPad these days. But there are some things I still miss. You can’t do everything on the iPad.

I do still miss full Photoshop, it has some really good tools that will speed up your work, tools that don’t exist in Procreate. Also it is hard to add text to the map while using the iPad. But hopefully one day Adobe will release a full version of Photoshop to the iPad, or I think that in the end they will loose a significant amount of users to Procreate. Because Procreate is developing in a very good speed and I guess that some of the tools I miss in the program sooner or later will show up. And for every tool that shows up I will miss Photoshop less.

So is the iPad Pro and Apple Pencil something I recommended for others to try out? I would absolutely say yes, but there is a small but. The iPad Pro is very expensive and if you’re not using it for professional work it is quite some money to host up. If you think it is worth it it is up to you to decide, if you use it for professional art work I think it is a must buy!

Trying out the Apple pencil

image

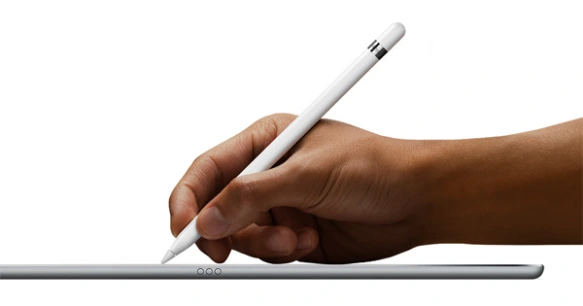
So this weekend I took the train the the apple store we have in Malmö to finally have a chance to try out the apple pencil. After having read Jonathan Roberts review of the pencil and the ipad pro my expectations where really high. And I must say that my first impression (after 15 minutes of use in the store) is very positive.

The pressure sensitivity and precision seems to be on par with my Cintiq I use at home. The only negative thing I felt was that the lag was a bit bigger on the ipad pro then what I get with my Cintiq 13hd. But I assume that was due to that the only demo program they had was photoshop sketch and from what I’ve read the lag should be much less in programs like procreate and paper 53. Still the lag is minor so the program still works fine to use for drawing. So I don’t really see that as a problem.

I will definitely pick this up next year when some map money arrives, I can really see how the ipad and pencil will work great as my portable drawing solution to use when I’m travelling. Whenever I get my hands on it I will put up a review here on the blog.

Making a grassy hill

2015-08-27 19.40.29

As I wrote in my last blog post I have started to make some terrain for miniature wargames. Model landscapes have always fascinated me and hopefully I can expand into this area with my company in the future, but to do that I need practice.

So the first task is to build a wargaming table that consists of four tiles that measures 45×45 cm, so the total playing area will be 90×90 cm. Hopefully a perfect size for some skirmish games, if not I can easily expand the table with some more tiles.

After having watched a ton of youtube films on how to build wargaming terrain, this is how I’m doing it. Hopefully it can inspire someone out there.

First of all you have to make sure that you have all the material you need to make the terrain. I’ve acquired the following, 45×45 cm MDF board tiles, glue, sand, filler, Styrofoam, static grass, paint and more glue. You cannot have too much glue while doing this, trust me on this one.

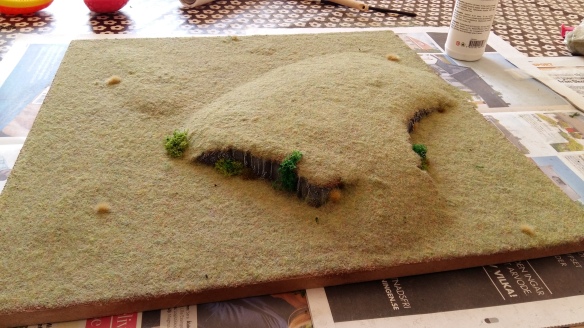
When you are sure you have all your materials it is time to do some planning. I decided to plan on how to make all four tiles from the start, so I know that I will have something that will be interesting to play on when I’m done. As the first tile to make I decided on a simple hill with some small cliff edges.

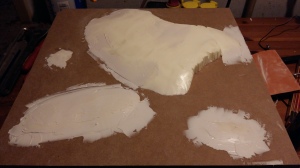
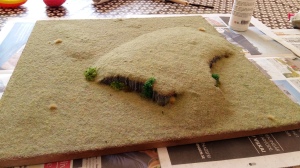
First I started with cutting out the hill from the Styrofoam and then gluing it to the MDF tile. I also added some very small hills so that the terrain wouldn’t be completely flat apart from the larger hill on the tile. This would make the terrain look more believable. The drawback to this, that I realized when I was done with the tile, is that it is hard to add terrains like houses or forests to the tile when you use it for a game. So I don’t recommend adding those small hills due to that the flexibility of the tile wont be maximized.

Secondly I sanded all the hills and also used filler to even out some uneven areas. Adding the filler is a step that I on later tiles successfully eliminated from my work process by making sure that the Styrofoam hills were more even from the start. But if you need to even things out it is easily done with some filler.

2015-08-20 00.26.00

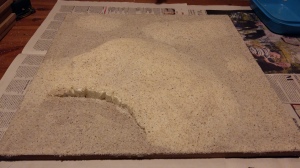
Next step, when you are satisfied with the terrain you have on the tile is to cover all areas, except cliff sides in glue and then pour sand on top of everything. Wait for maybe ten minutes and then turn the tile on its side to get rid of all the excess sand that hasn’t got stuck in the glue.

2015-08-20 21.52.48

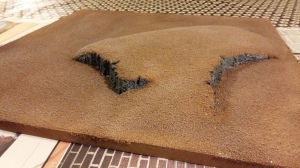
When the tile has dried I sprayed the whole tile with brown paint. When the paint was dry I highlighted all the sand with some white paint and also painted all cliffs grey. When the cliffs where dry I painted them with some dark tone wash from Army painter. I let that dry for a day and then highlighted all the cliffs. This gives the cliffs a very nice colour with a lot of details to it.

2015-08-21 23.36.01

The last step is to add static grass. To do this I again covered the tile in glue. Make sure that you get quite a thick layer. Then I mixed two colours of static grass, light green and summer green, and poured it all over the tile. Make sure to do this on top of a newspaper so that you easily can reuse the excess that you get. At this stage I also added some static grass tuffs and bushes from Island moss. When everything had dried (I waited for 24 hours) I fixed the static grass by spraying the tile with a 50/50 mixture of water and PVA.

hill

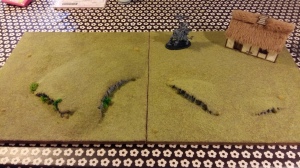
Well that’s about it. You will now have a nice looking tile with a grassy hill. So when you are dome with the first you can just start with the next one. And remember you are always one tile short from being finished.

A new kind of mapping

hill

If you’ve followed me on this blog you know that I like to draw maps. And what started as a hobby later turned into something that I actually make money from. But sometimes you feel like you want to explore new areas of mapping, like making model landscapes.  And yes I think you can see that as a kind of map making as well.

Making model landscapes, primarily for miniature war games, is something that I’ve liked to try out for a long time. I’ve always been fascinated by landscapes that you see at museums or when people play miniature games. Not to talk about those lovely model railways people build. I can stand and watch these small worlds forever. I just love to look at the details that are put in to the models that are at display.

So this summer I decide that I wanted to try to make my own table top landscape. Both because I was curious to see if I’d be any good at it and secondly, if it works out well, I might be able to start making these kind of models for commissions. That’s the plan at least. But to find out if this is doable I first had to learn how to do it. And to do that, I turned to YouTube.

It’s actually quite amazing to see how many videos on making table top gaming boards and miniature war gaming scenery that are out there. Quite soon I found TheTerrainTutor’s channel which is an absolute gold mine if you want to get into this. Especially I liked the videos he made on basic techniques, those really helped me get up to speed trying to do this myself.

After having watched many hours of terrain building videos, I started to make a plan on how to make my own. I decided that I wanted to make the terrain on 45×45 cm MDF boards, that I easily could store away when not in use, instead of going for one big table that needs a large permanent place in the house. With many tiles to use I could also easily make up different variations of my table from the same tiles.

All terrain on the tiles, like hills, cliffs etc I would make from Styrofoam. And since I acquired a hot foam cutter I could easily shape the material as I pleased. I would actually recommend everyone that wants to make some miniature terrain to get one, it makes things so much easier. And the end result will look many times better.
I also bought some static grass and sand to use as base material for the ground on the tiles. And last but not least you need glue, a lot of glue.

In the next post I will take you through the process I used to make the actual hill tile that you can see at the top of this post.

Going too big……

Ankh-Bathor_3_6

Mapping cities is probably one of the most demanding things you can do, but also one of the most rewarding ones. I must admit that I really love mapping cities and by using a tool like City designer 3 from Profantasy it is something that actually anyone can accomplish. But even though the program is fantastic it has its limitations, and so does the human mind.

In my fantasy world “the Etrakien world”, there is a city named Ankh-Bathor that, like Rome in the Roman Empire, is the actual center of the world. Ankh-Bathor was the first part of the world that I worked on. I had this idea of a large city that was situated in between two oceans on a small strip of land. The city would be both a lock and passage between the two sides of the world, a strategic location that would make it rich, splendid and the natural focus point in the world. From there the world just started to grow in all directions, until what it is today.

After having made a map or two of the world I felt that I also had to make a map of the city. But as it turned out this wasn’t really an easy thing to do. I think I have at least ten different versions of the city and none of them is complete. There are so many things I’d like to add but the size of the city makes the task quite challenging. Also some limitations in City Designer 3 did put an end to one of my most ambitious attempts, and probably saved my mental health.

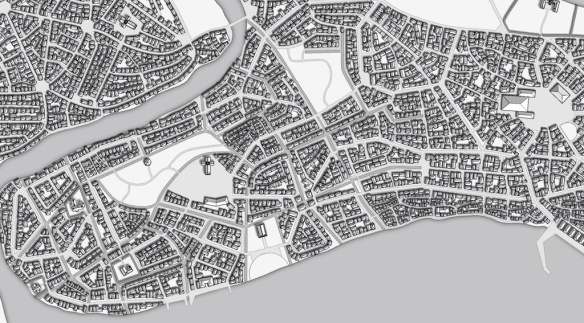
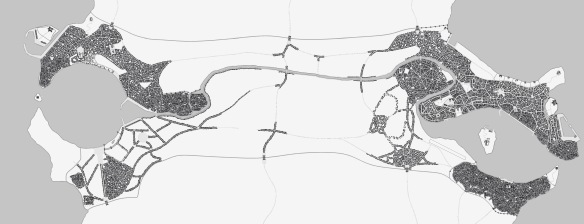
At the top of this post you can see part of the map of Ankh-Bathor that I made in the black and white style that was released in one of the annuals from Profantasy. But as you can see in the zoomed out map below the sheer size of it is quite enormous.

Ankh-Bathor

What actually happened is that the size of the .fcw file got too big for the program to handle. In the end the file ended up being just over 11 MB big when the program crashed. As soon as I got beyond that size I couldn’t open the map anymore, so I had to divide the map into many smaller map parts that I later had to stitch together in Photoshop. This made the whole process more complicated so after a while I gave up. I also felt that the end result wasn’t what I really wanted, so when the whole process of making the map got more complicated it was actually a quite easy decision to make to drop the map. Sometimes you have to kill your darlings.

Still there are parts in the map that I really like, and I hope to be able to finish a map of Ankh-Bathor one day. Or let me rephrase that, I will finish a map of Ankh-Bathor one day.

Etrakien revisited

armadien ankh bathor 3

I think we all carry a world inside of us, a world that sometimes just wants to get out and have its story told. For me that world is the Etrakien world. I think I must have been working on and off on it for about 15 years now. I have bits and pieces of it spread around in notebooks, papers and maps. Mostly maps I must admit.

It is so easy to drown in your own creation, one thing leads to another and suddenly you are trying to describe a world so vast that it is impossible to get it all down on paper. Things start to contradict each other and quite soon you are losing control of it all. For me it has been a challenge to try to narrow down my world to a size that is manageable. This whole process has of course forced me to rebuild the world more than once, I’m probably on version three or four now, since I started out.

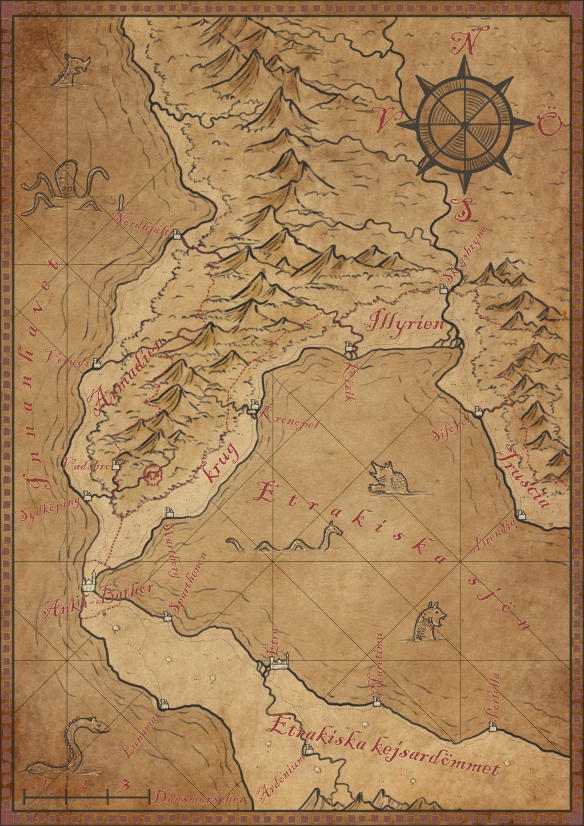
At the top of this post you see the latest version of the map of the Etrakien world. So what is different in this version compared to the other versions of the map? And why have I decided to do the changes that I have made?

Well first of all I’ve decided to concentrate the development of the world to a smaller area. Before I tried to focus on the whole world but the task soon got a bit overwhelming. And since most of the ideas I have are concentrated around the city Ankh-Bathor and its neighboring states I figured it would be a good idea to make a new map with this area in focus, a map which I can use while continuing the work on my world. Or at least a map I can use until I decide to make a new map again.

So what is the Etrakien world? As I wrote before I’ve been working on the world for almost 15 years. That might sound like a lot, but it hasn’t really been a straight road of work, Sometimes I haven’t worked on it for months, or maybe a year. But for some reason I always come back to it, I kind of like having a world of my own to discover and develop.

The world itself is a Fantasy world where humans are the dominating race, there are other humanoid species as well but they are mainly concentrated to smaller areas in the outskirts. In the world you have the civilized area where you have kingdoms, empires and great cities. Outside the civilized area you have the wilderness, vast forests, great deserts and enormous mountains. Here you can find ruins of past civilizations, mythical creatures and barbarian tribes.

The kingdoms and empires of today are all built upon a world of ruins from an earlier civilization that was destroyed during the war with the gods. This happened a long time ago and today the memories of this time is long gone, only the ruins remains, and the scars in the fabric of the world. Scars that in some areas tend to break, opening a gateway to the other side, the borderlands.

After the war of the gods the world was on the brink of total destruction, but humanity survived and slowly started to rise again, creating a new world in which the darkness of the past only lived on as children’s stories. This new world would be dominated by the Etrakien Empire for hundreds of years. But when the Empire was on its height of power the black plague started to spread, in which nearly half of the world’s population died. This caused the Empire to collapse and from its former domains many smaller kingdoms arose. The Empire itself does still exist but is only a shadow of its former strength, affected by civil war and corruption.

So that is the Etrakien world, a world of adventure, corruption and war. And hopefully one day I can have it finished, but I doubt that will ever happen. It tends to have a life of its own.

Bad bad Wacom

procreate

Some months ago I bought an Intuos creative stylus 2 from #Wacom. Well the first impression was that it didn’t work very well, especially the offset from where you where drawing was too big.

But the pen was new and not many programs supported it on the ipad yet. Especially I waited for procreate to support it. Well at last the support is there, or to be more exact, the pen is unsupported but works in the program.

So the big question is it any good?

Well I’m really sad to say that this probably is the biggest piece of crap that I have ever bought for my mapping. I would actually not recommend it for anyone at its current state.

Or as Procreate writes on their forum;
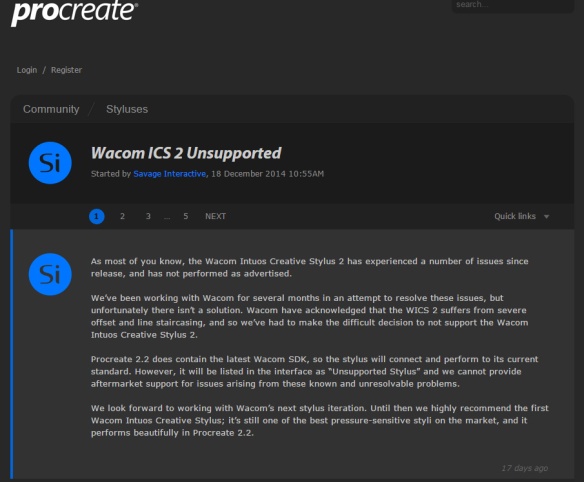
“We’ve been working with Wacom for several months in an attempt to resolve these issues, but unfortunately there isn’t a solution. Wacom have acknowledged that the WICS 2 suffers from severe offset and line staircasing, and so we’ve had to make the difficult decision to not support the Wacom Intuos Creative Stylus 2.”
http://procreate.si/forums/index.php?topic=5620.0

At the moment the pen doesn’t live up to anything that Wacom promises, and it really makes me angry. Don’t really know where to go from here, but I sincerely hope that Wacom will fix this in the end. But at the moment I’m stranded with a piece of hardware that I cannot

Mapping in symmetry

grave

Artrage is a program that I really like but seldom use. So tonight I decided to do some tests in it just to see what I can use it for while mapping.

One of the coolest tools in the program is the symmetry tool that let you draw in more than one place simultaneously on your drawing, aka in symmetry.

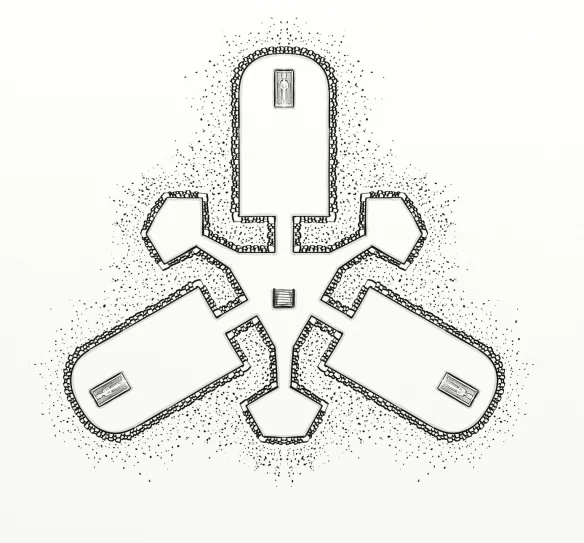
I decided to test the function while making a quick old school map of a grave. And I must say that I see a lot of potential in the tool. It can really quicken up some parts of your map, if your doing a map that is at least symmetric in parts.

The tool is very easy to setup, you find it under Tools\paint symmetry. Give it a try and you will be surprised how fun it is to use.

Halloween sale

halloween sale

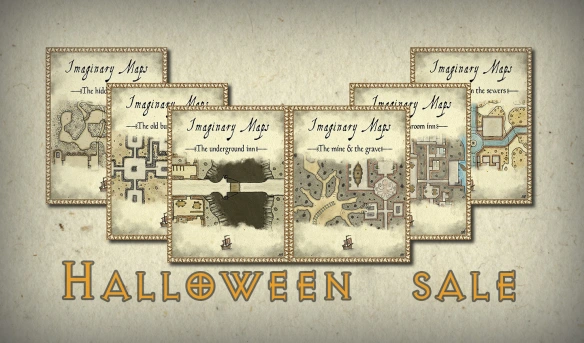
As you might remember from my latest post I have started up a store at RPGNOW selling some of my maps. This week it’s halloween and I’ve decided to have a small sale of all my maps so far released. So this week, until the end of the month (October) you can purchase my maps for 0.99$ instead of 1.39$.

So if you are in need of some maps for a Halloween gaming session head over to RPGNOW and pick up a map or two. If you buy a map I would also appreciate if you like to give a review of the product. And also if you have a suggestion on something I could improve in my maps or if you have a map idea you like me to draw feel free to contact me on par(dot)lindstrom(at)gmail(dot)com or write a comment in this post.


Selling my maps

Front cover blog
One thing often leads to another. As I wrote in my last post I’ve started to make hand drawn old school maps. Mostly because I think it is great fun, but also because I spend a lot of time away from my computer and Cintiq tablet, so I sometimes have to use other means while mapping.

After having done a couple of maps in my moleskin notebook I decided that it would be fun to try and colour them. So I scanned them and cleaned them up in Photoshop, before adding colour. I tried to keep the colour as natural as possible, I want it to look like this was done on paper and not in the computer. After doing some tests I think I found a style that works very well.

But what to do with those coloured maps? Just letting them lie around on the computer wasn’t really a good idea, so I decided to set up an account at RPGnow so I can sell them for a small price.

So if you feel like you are in a great need for some old school maps for your adventure, or just want something to put on your wall you can head over to RPGnow and check them out.

If you have any suggestions on old school maps you would like me to do, or if you think something is missing in the ones I’ve made. Please comment in this post or send me a mail on par[dot]lindstrom[at]imaginarymaps[dot]se with your opinion.